
Holograms are one of the most popular shader effects in Unreal Engine 5. Various effects can be created with them, such as ghostly apparitions and energy blasts. I’ll explain how I created the hologram shader in this article. I have also added a Hologram tutorial in Unreal Engine 5 below.
Bump Offset
I began this hologram tutorial by establishing a bump offset. The goal of this is to discern the amount of depth present between two textures.While the Bump Offset Material Expression is a cheap and easy way to add depth to your materials, keep in mind that it is only an illusion. The effect could break down if the player or user moves the camera in a way that is parallel to the surface that has the Bump Offset effect applied. In this instance, it is an acceptable results.
If you want to know more about the Bump Offset read here: Using Bump Offset
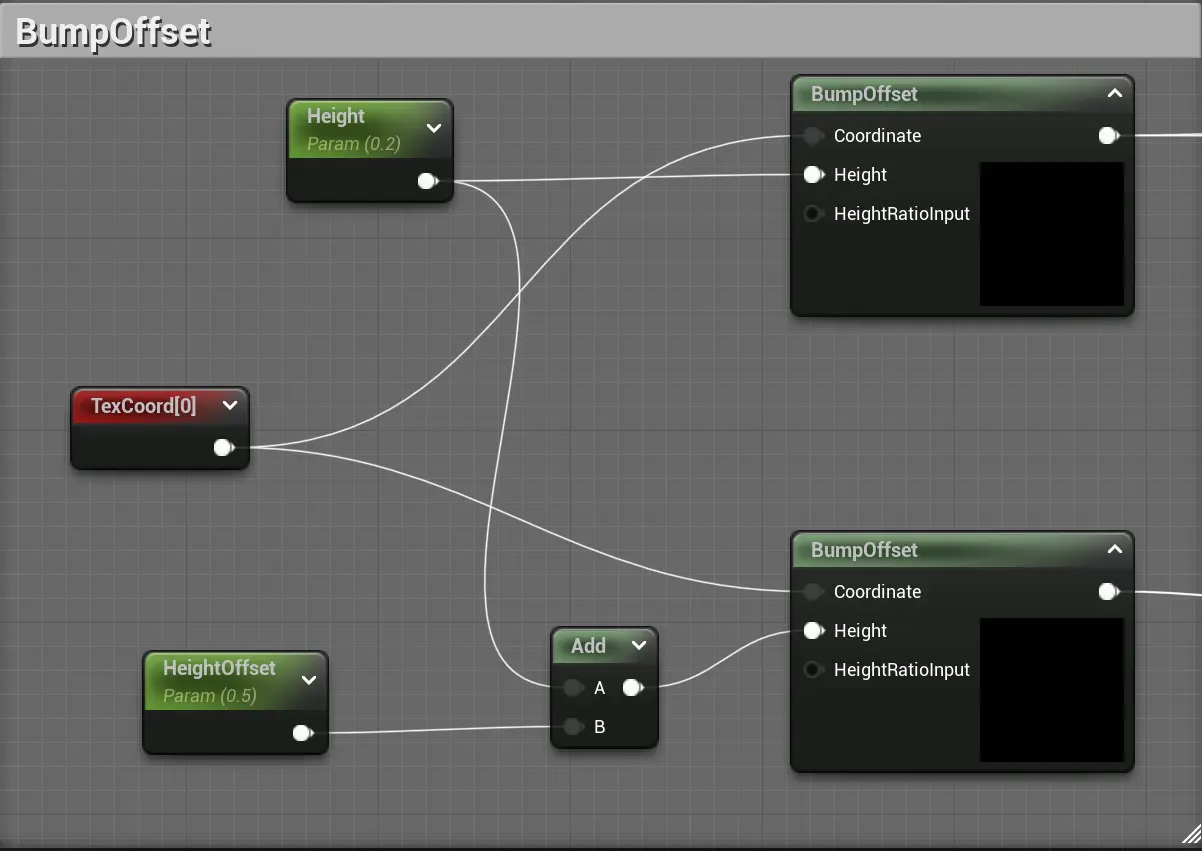
As you can see in the hologram tutorial, there is a slight distance between the two textures. In this case, it is exactly what I was looking for – a bit of depth. This allows me to control the offset by using both the height and the offset. I usually keep this to .5 or .2 .
Glitch
Because I wanted to avoid having a lot of nodes, I used a material function. To drive the glitching, I set up a texture that would be the main driving force. My inspiration came from Klemen Lozar through his Twitter post about Glitching.
He used a texture to break it up through its UVs (3D mapping of an image). And I was inspired to do something similar with this hologram material.
The way I did it was to append two vectors together. Using the append node, so I can control the U and V of the textures independently, and then I’m using a panning node to pan them in Y. Then, I used a Component Mask to extract the Red Channel from one texture and the Green Channel from the second texture. I multiplied the channels together and then applied a displacement effect so that I could distort and glitch the logo.
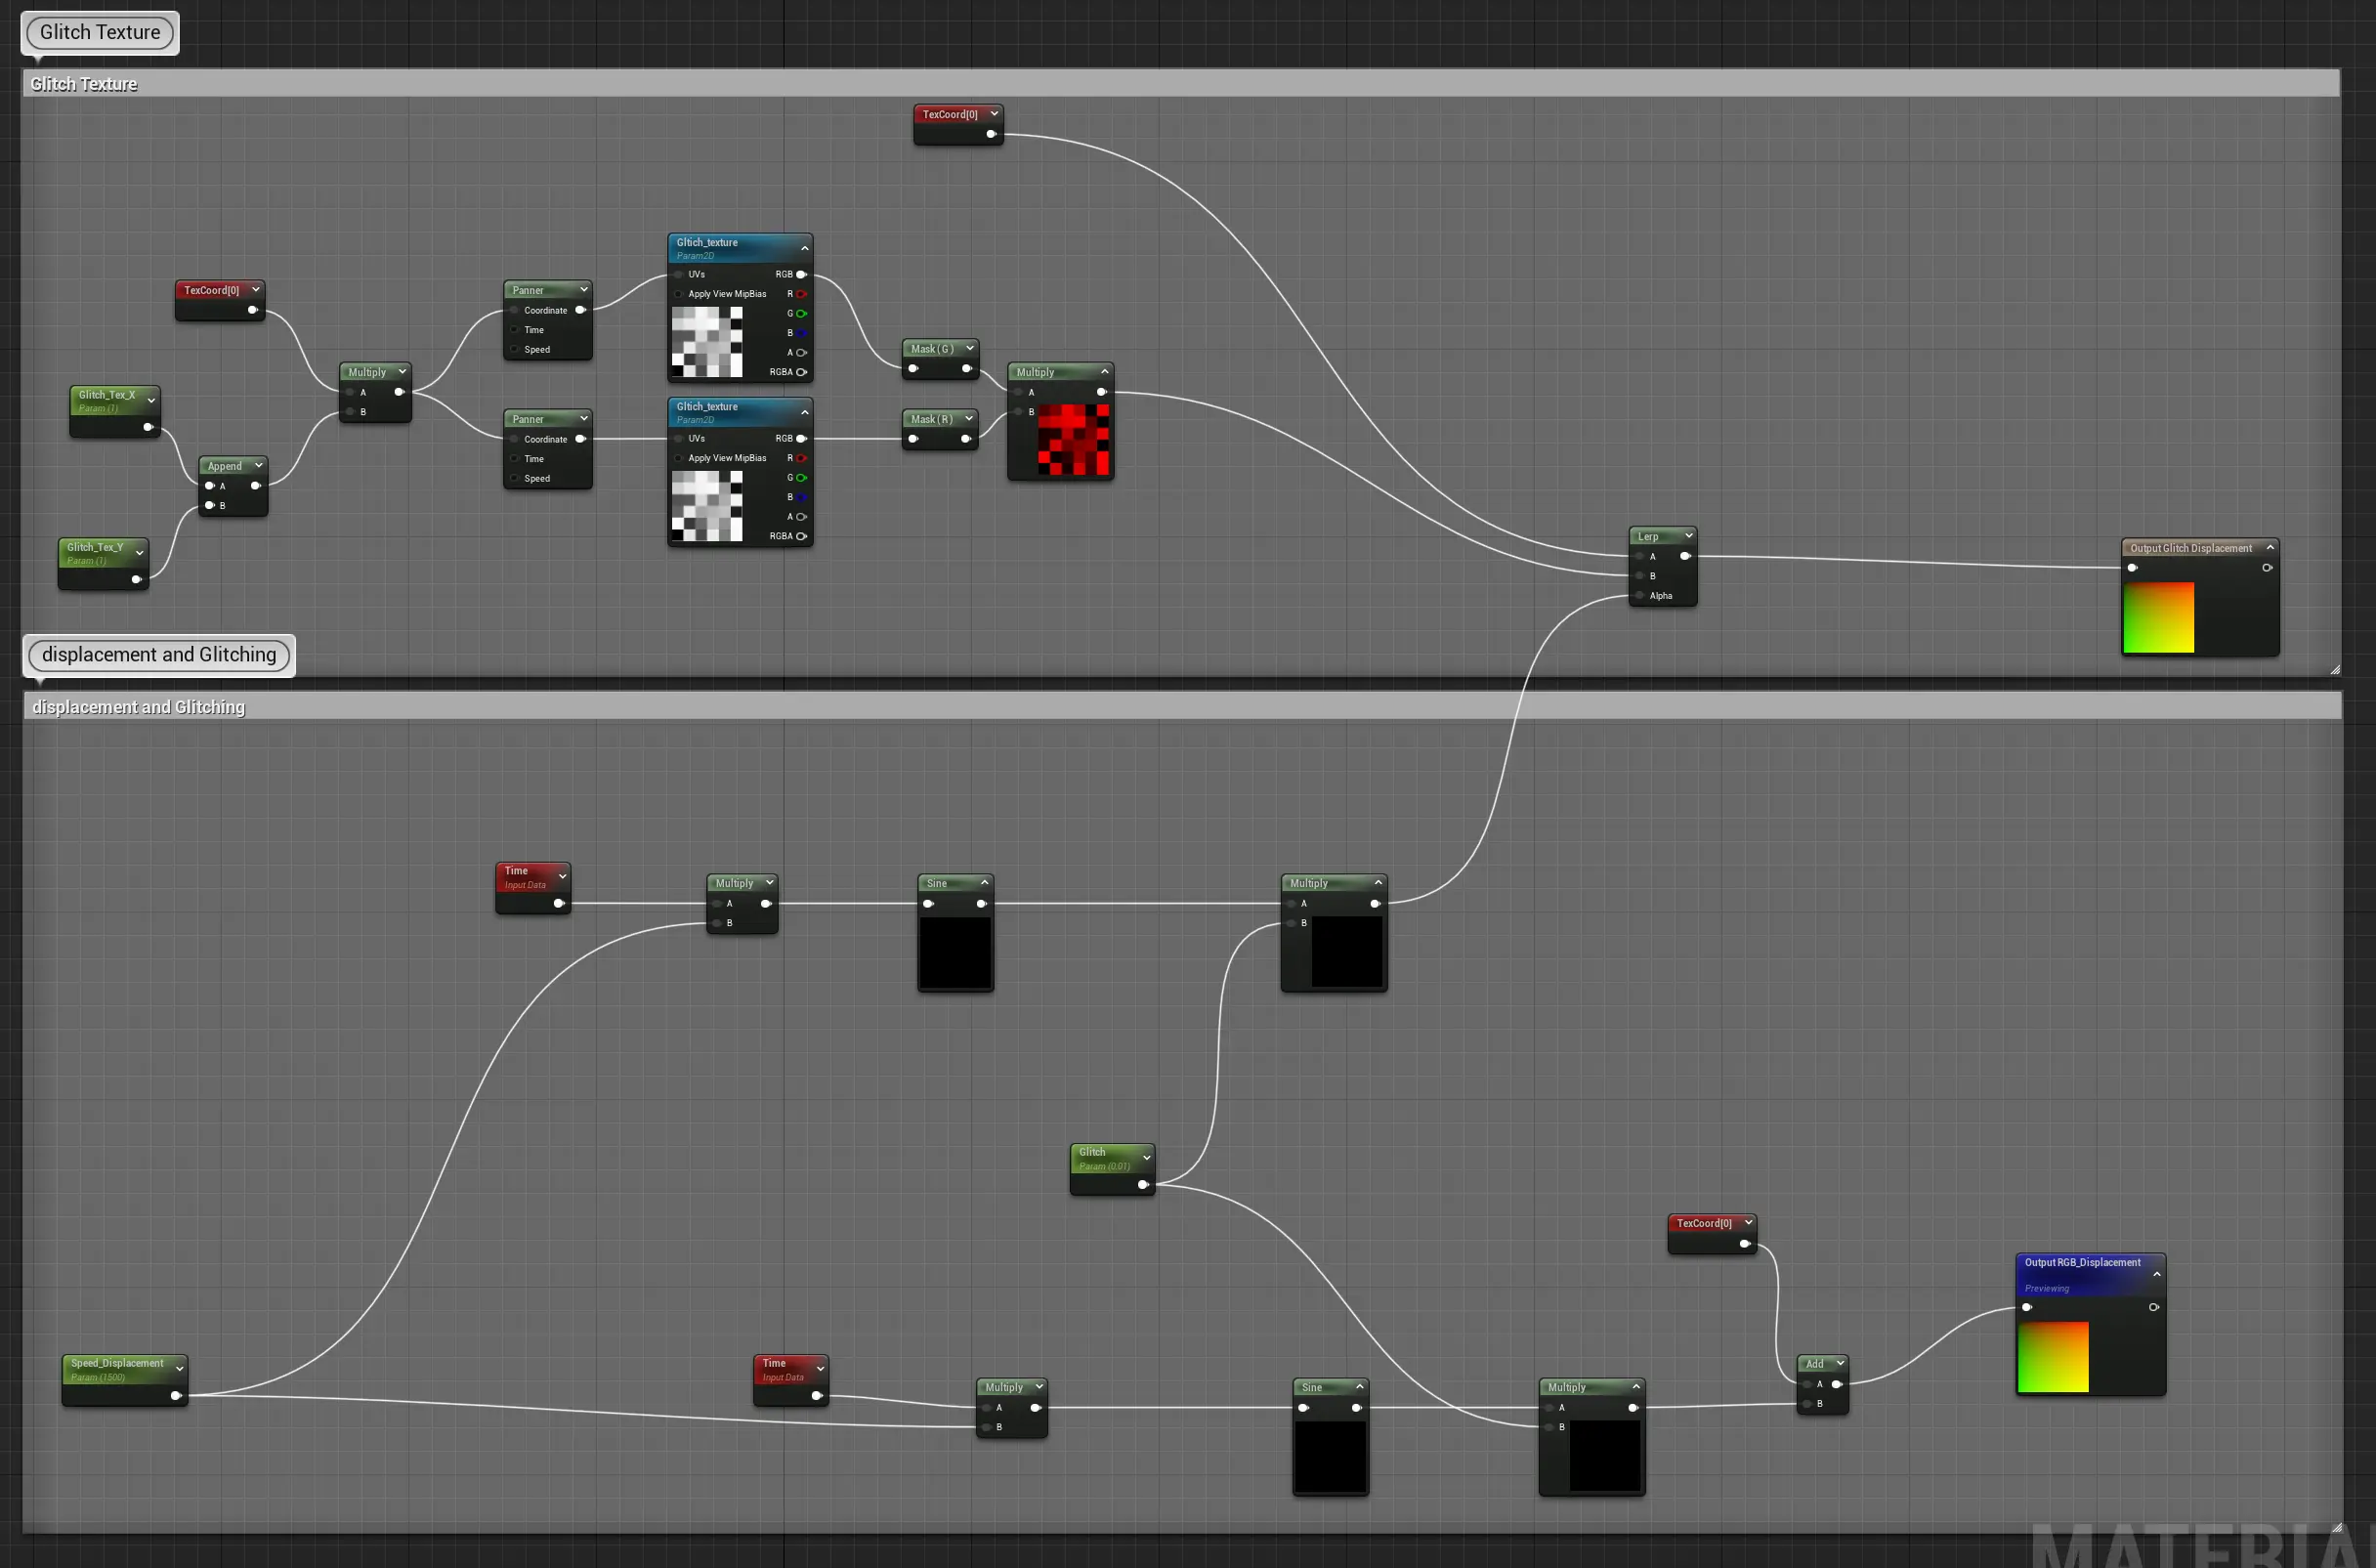
I used the time node with a sine to displace the UV, which I then multiplied by the Glitch parameter to control the displacement and the glitch effect simultaneously.
Texture Setup
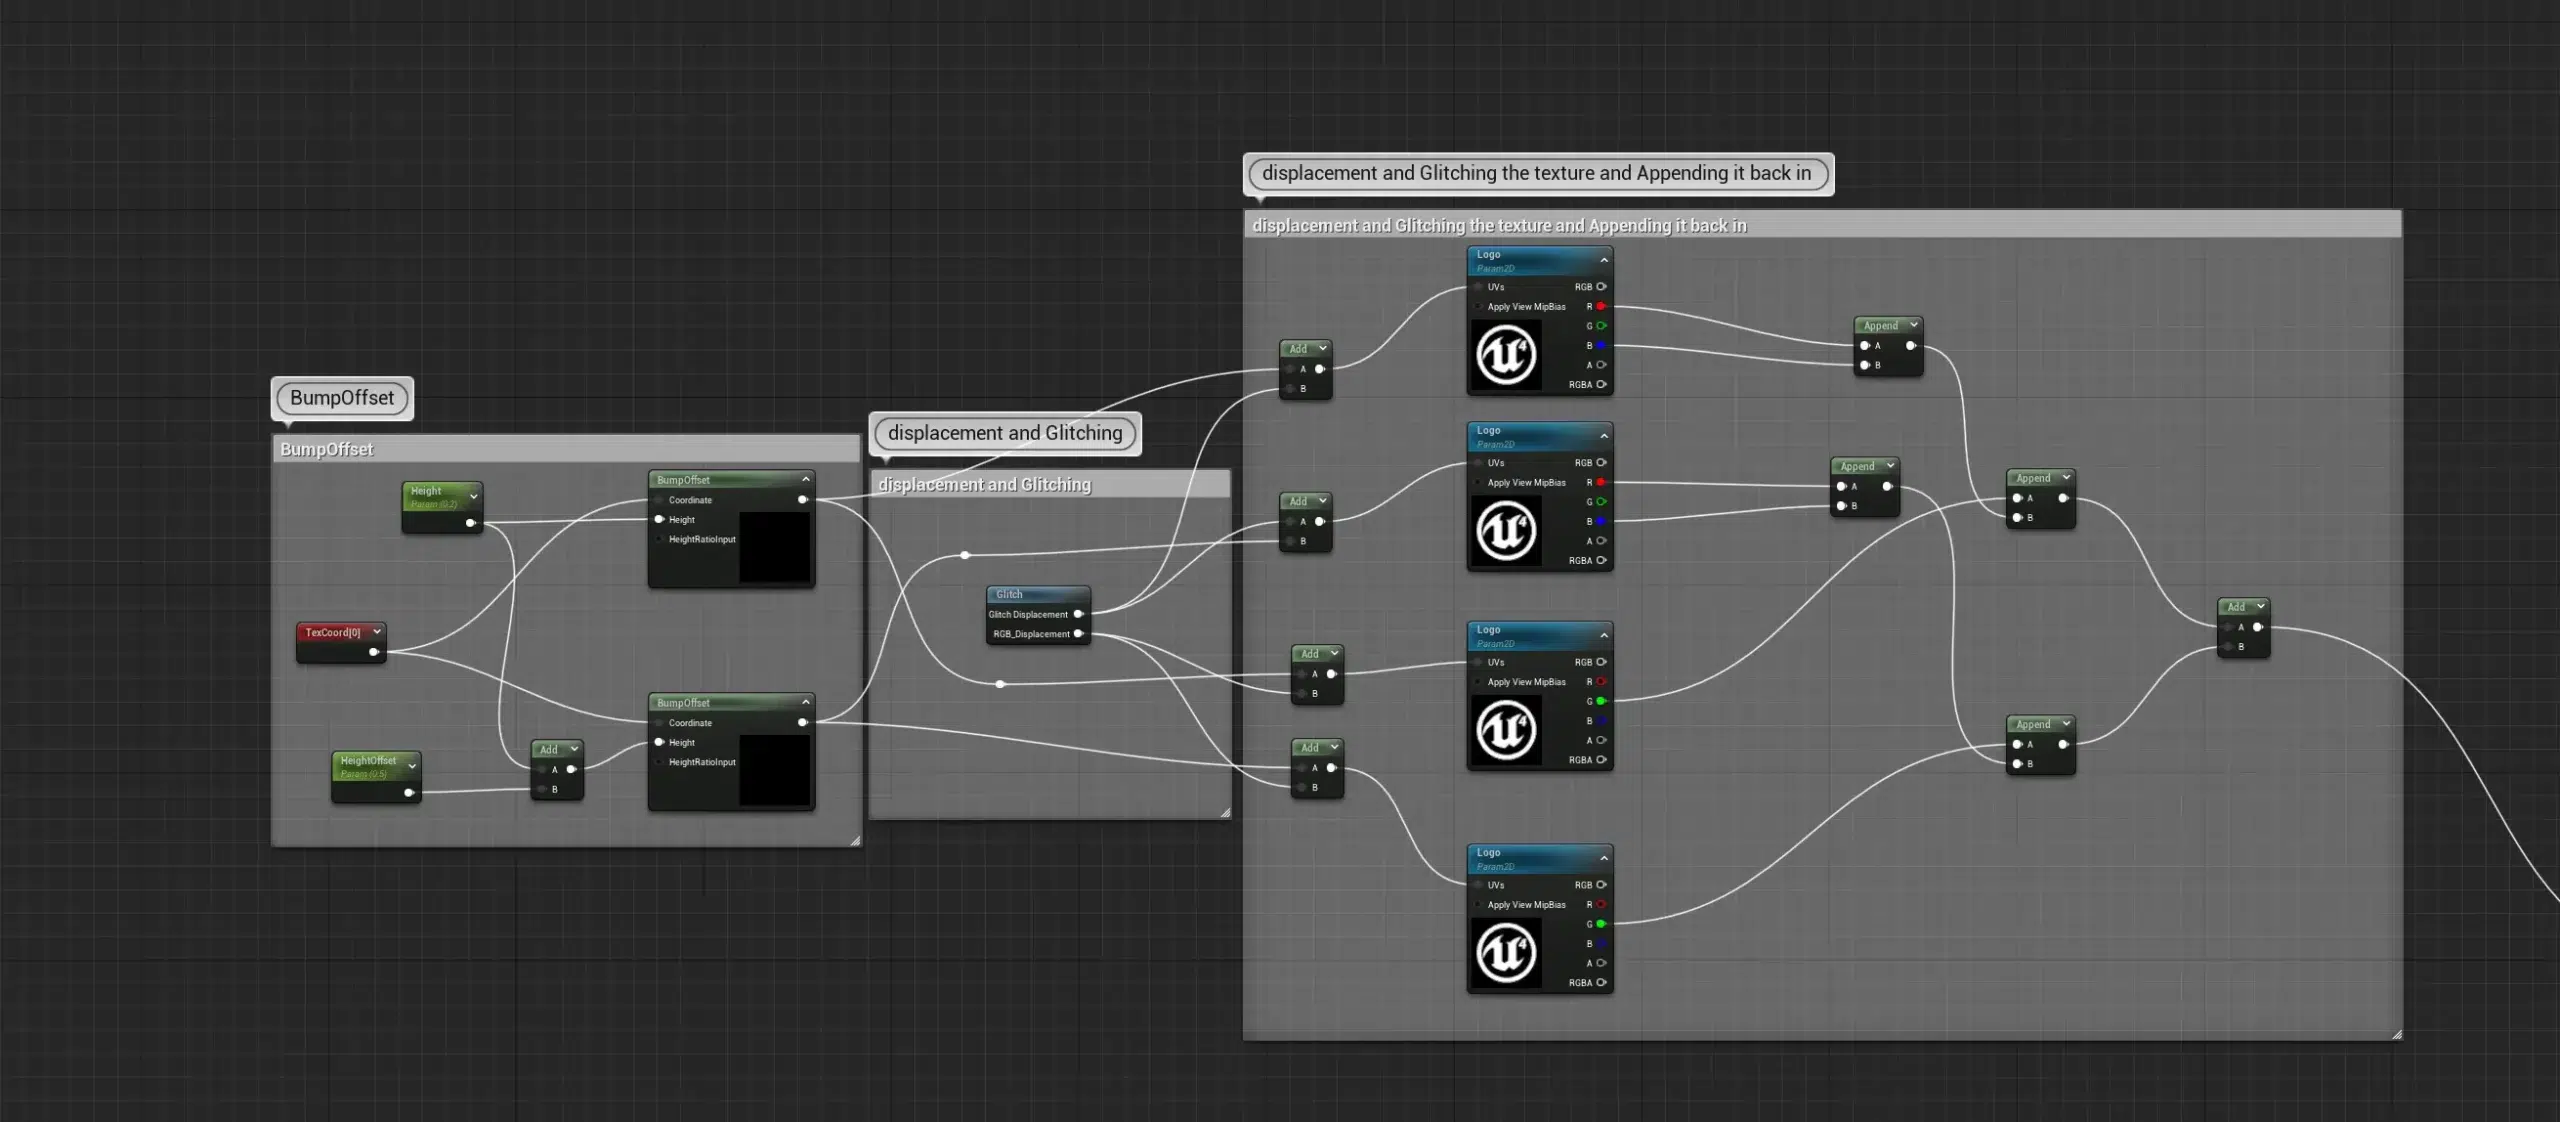
The displacement method for two textures and the glitching method for two textures are used together. Therefore, I would have two textures that are displacing and two textures that are glitching. Appending the textures together and then adding them all together.
Dots
For the dots i made a texture. I wanted it to look like an LCD screen in the hologram background.
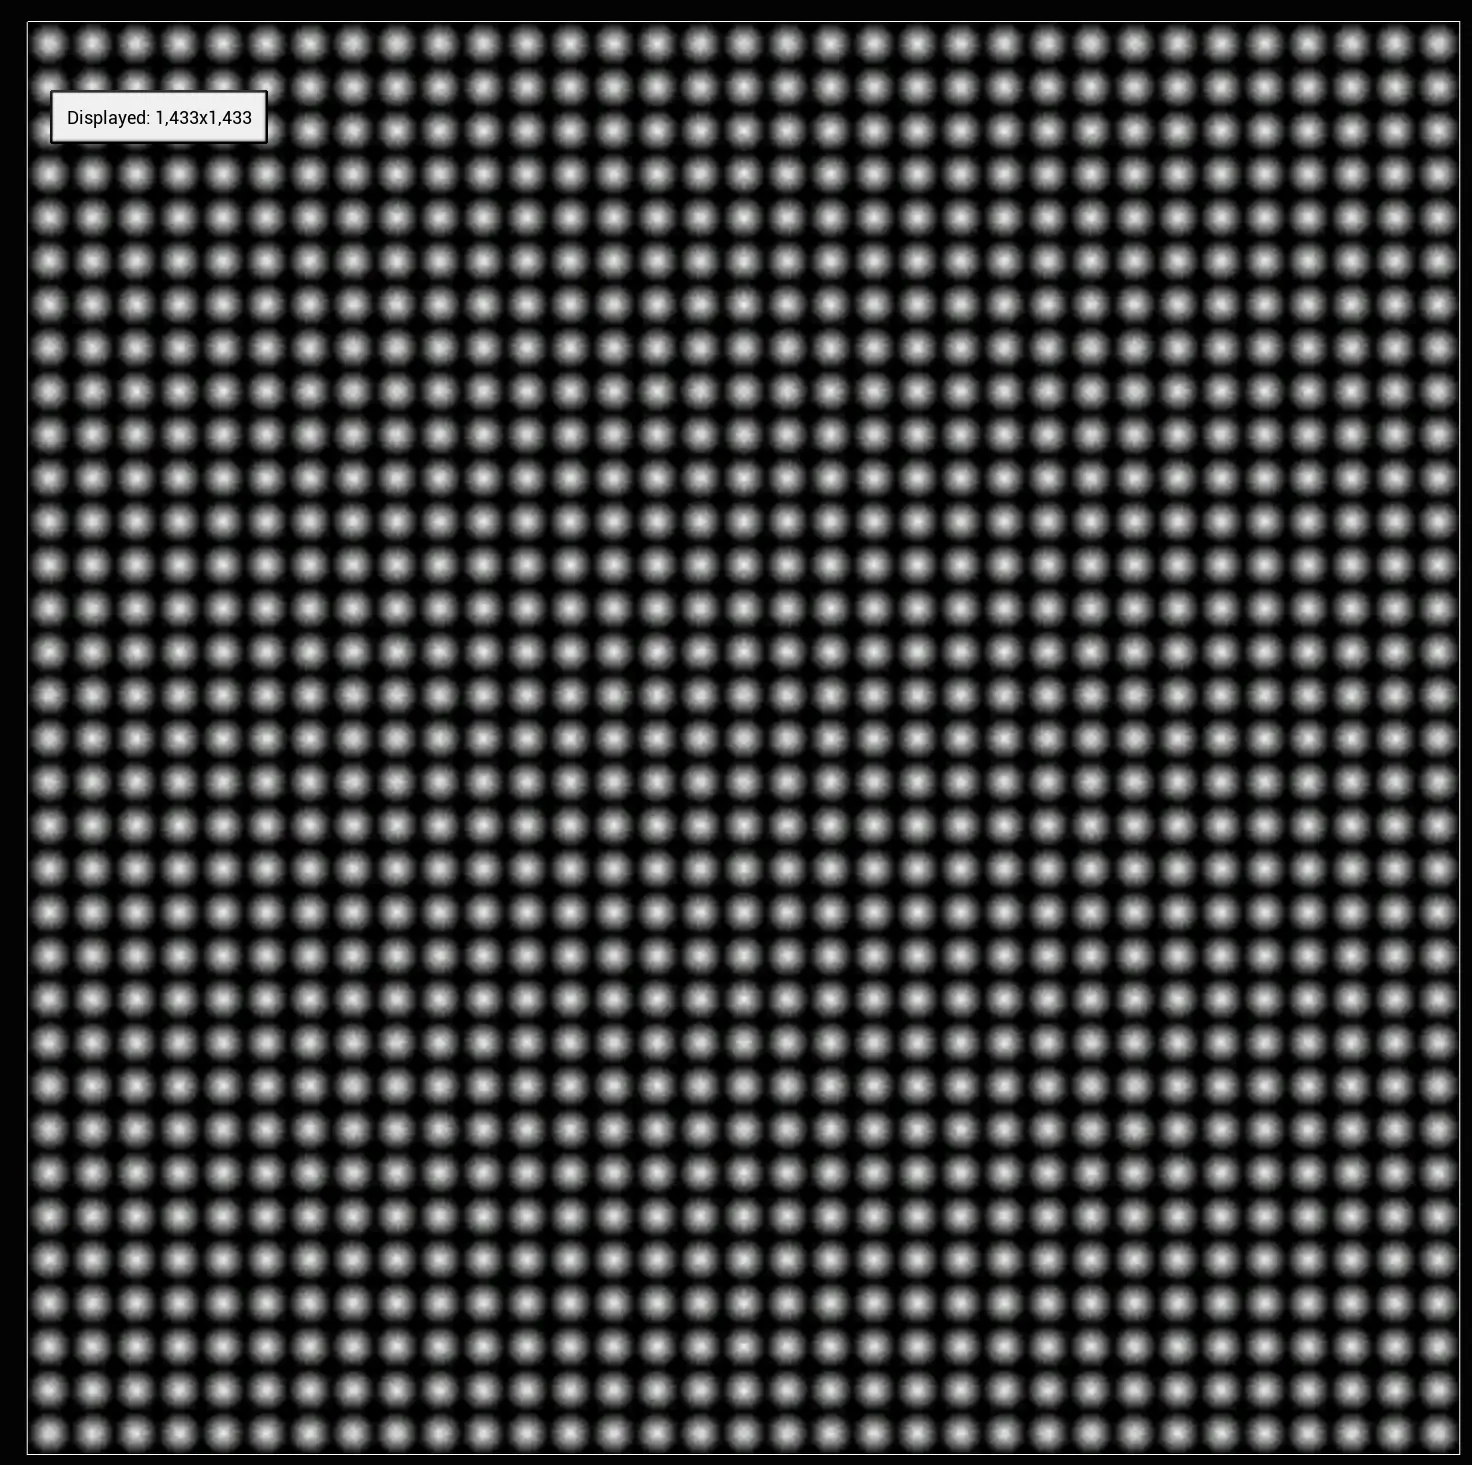
In the hologram tutorial I set up the texture and appended with two vectors into the UV coordinates and multiplied them into the UVs. So now I can individually control the coordinates by their vectors. And then I multiplied it with a radial gradient exponential to be able to control the radius and fall off of the dots. I control the radius and then the density of the radius. And then I multiply that with the texture and add it all together.

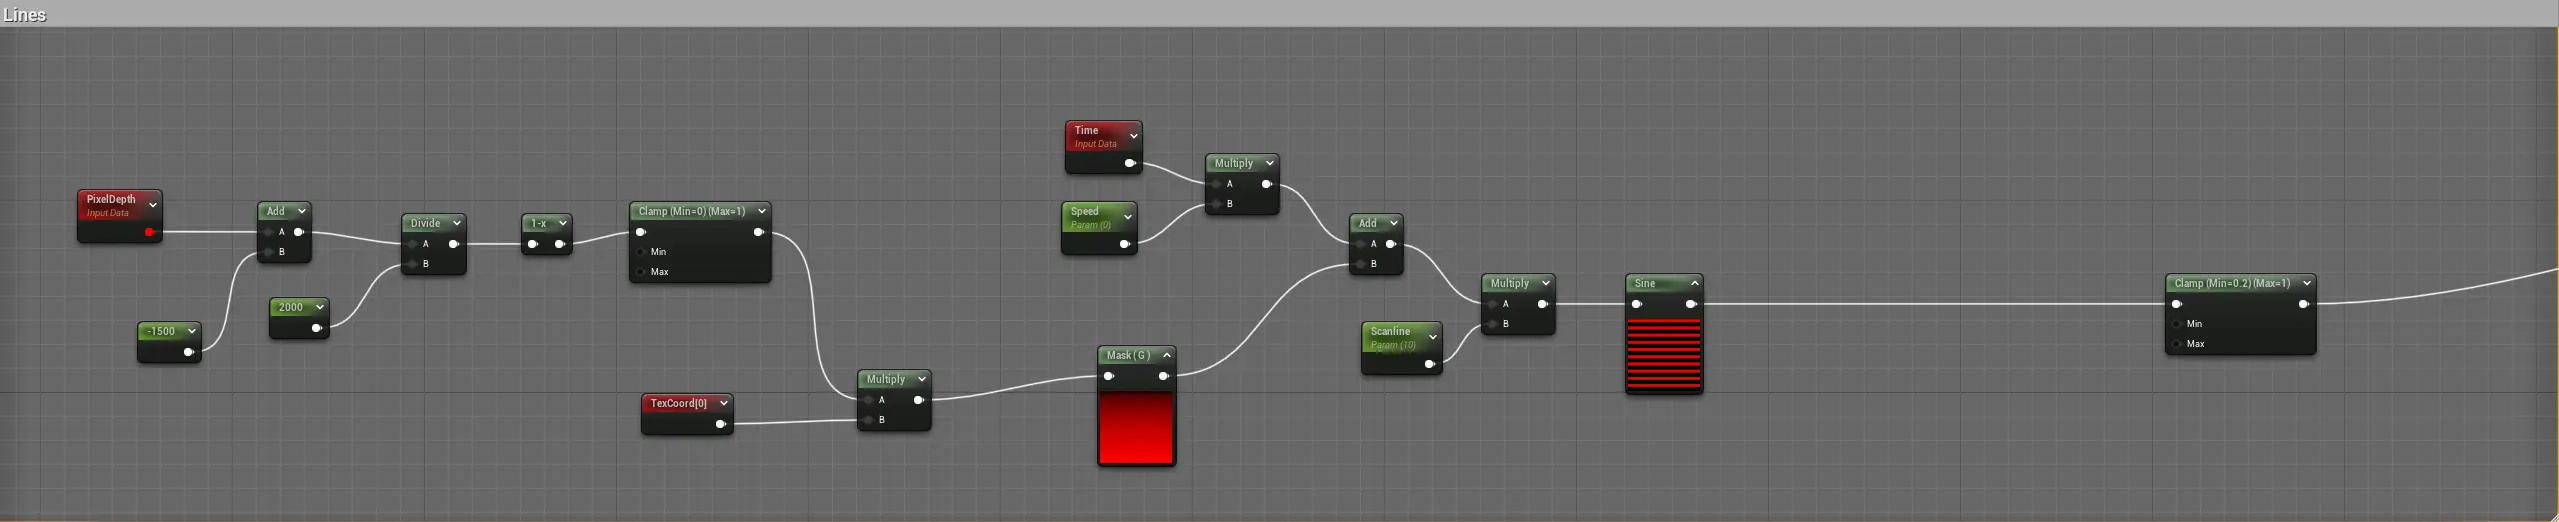
Lines
The actual lines that you see in the hologram tutorial i did using math. I initially wanted to do it in a texture, but after testing it out with the texture, It didn’t work out well because I was getting a little bit of repetition and it was noticeable so I decided to use a sine wave.
Color and Emission

Here I am multiplying the result of adding all the textures into a color and multiplying that with a parameter to increase the hologram’s visibility.
Reveal
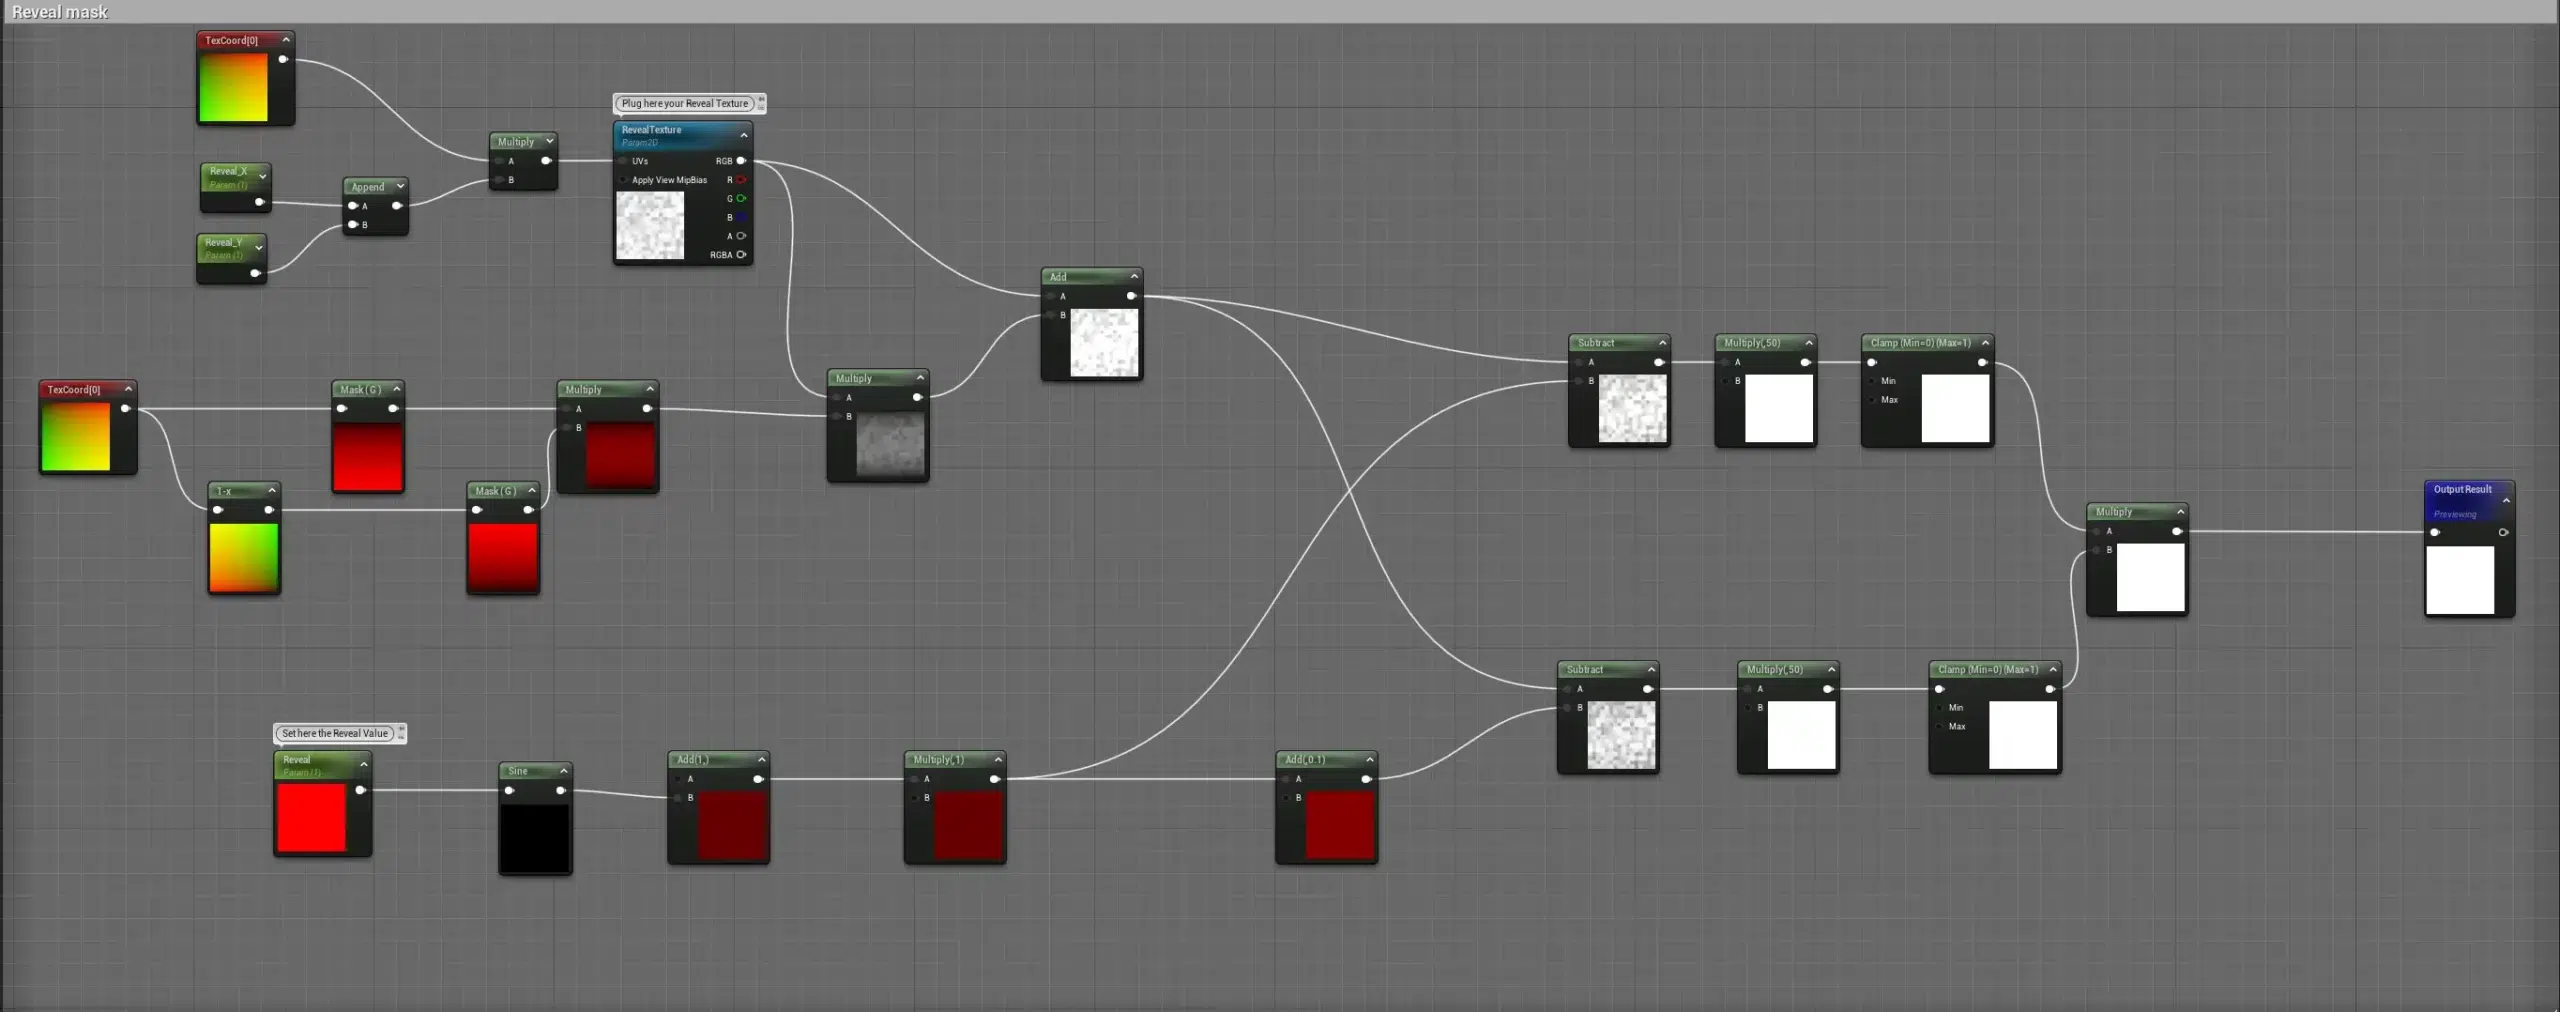
I broke down the reveal section of the hologram tutorial into different parts to make it less complex.
Texture
I used two parameters, named X and Y,(U and V) and appended them to control the UVs. Then, I multiplied them with a tex corrodents. Afterwards, I added the results to the texture UV.

Mask
I used a tex coordinate, one fading from top to bottom and one from bottom to top. I achieved this by using a component mask and the green channel for one, then inverting the results from the texture coordinate with a -1 node. I then used another component mask to see the inversion and multiplied them together. Now the fade will start from the center and go to the top and bottom.

Reveal paramters
I used sine to control the reveal and then added 1 and multiplied by 1.

Here is where it gets a bit complicated…
I first multiplied the mask and texture results together, then added the multiply into an add B. Finally, I added the texture into A. I did this so that my results wouldn’t have a gradient.
I then used a subtract in A, adding my results from the add. In B, I added the results from the reveal parameter. After that, I multiplied it by 50 and clamped the results to avoid getting results outside the 0-1 range. I did the same setup but with an add before the subtract for the reveal paramter this allowed me to setup a different gradient to the postions of the reveal. You can watch it closely in the video of the hologram tutorial.

In the end, I multiplied everything together.
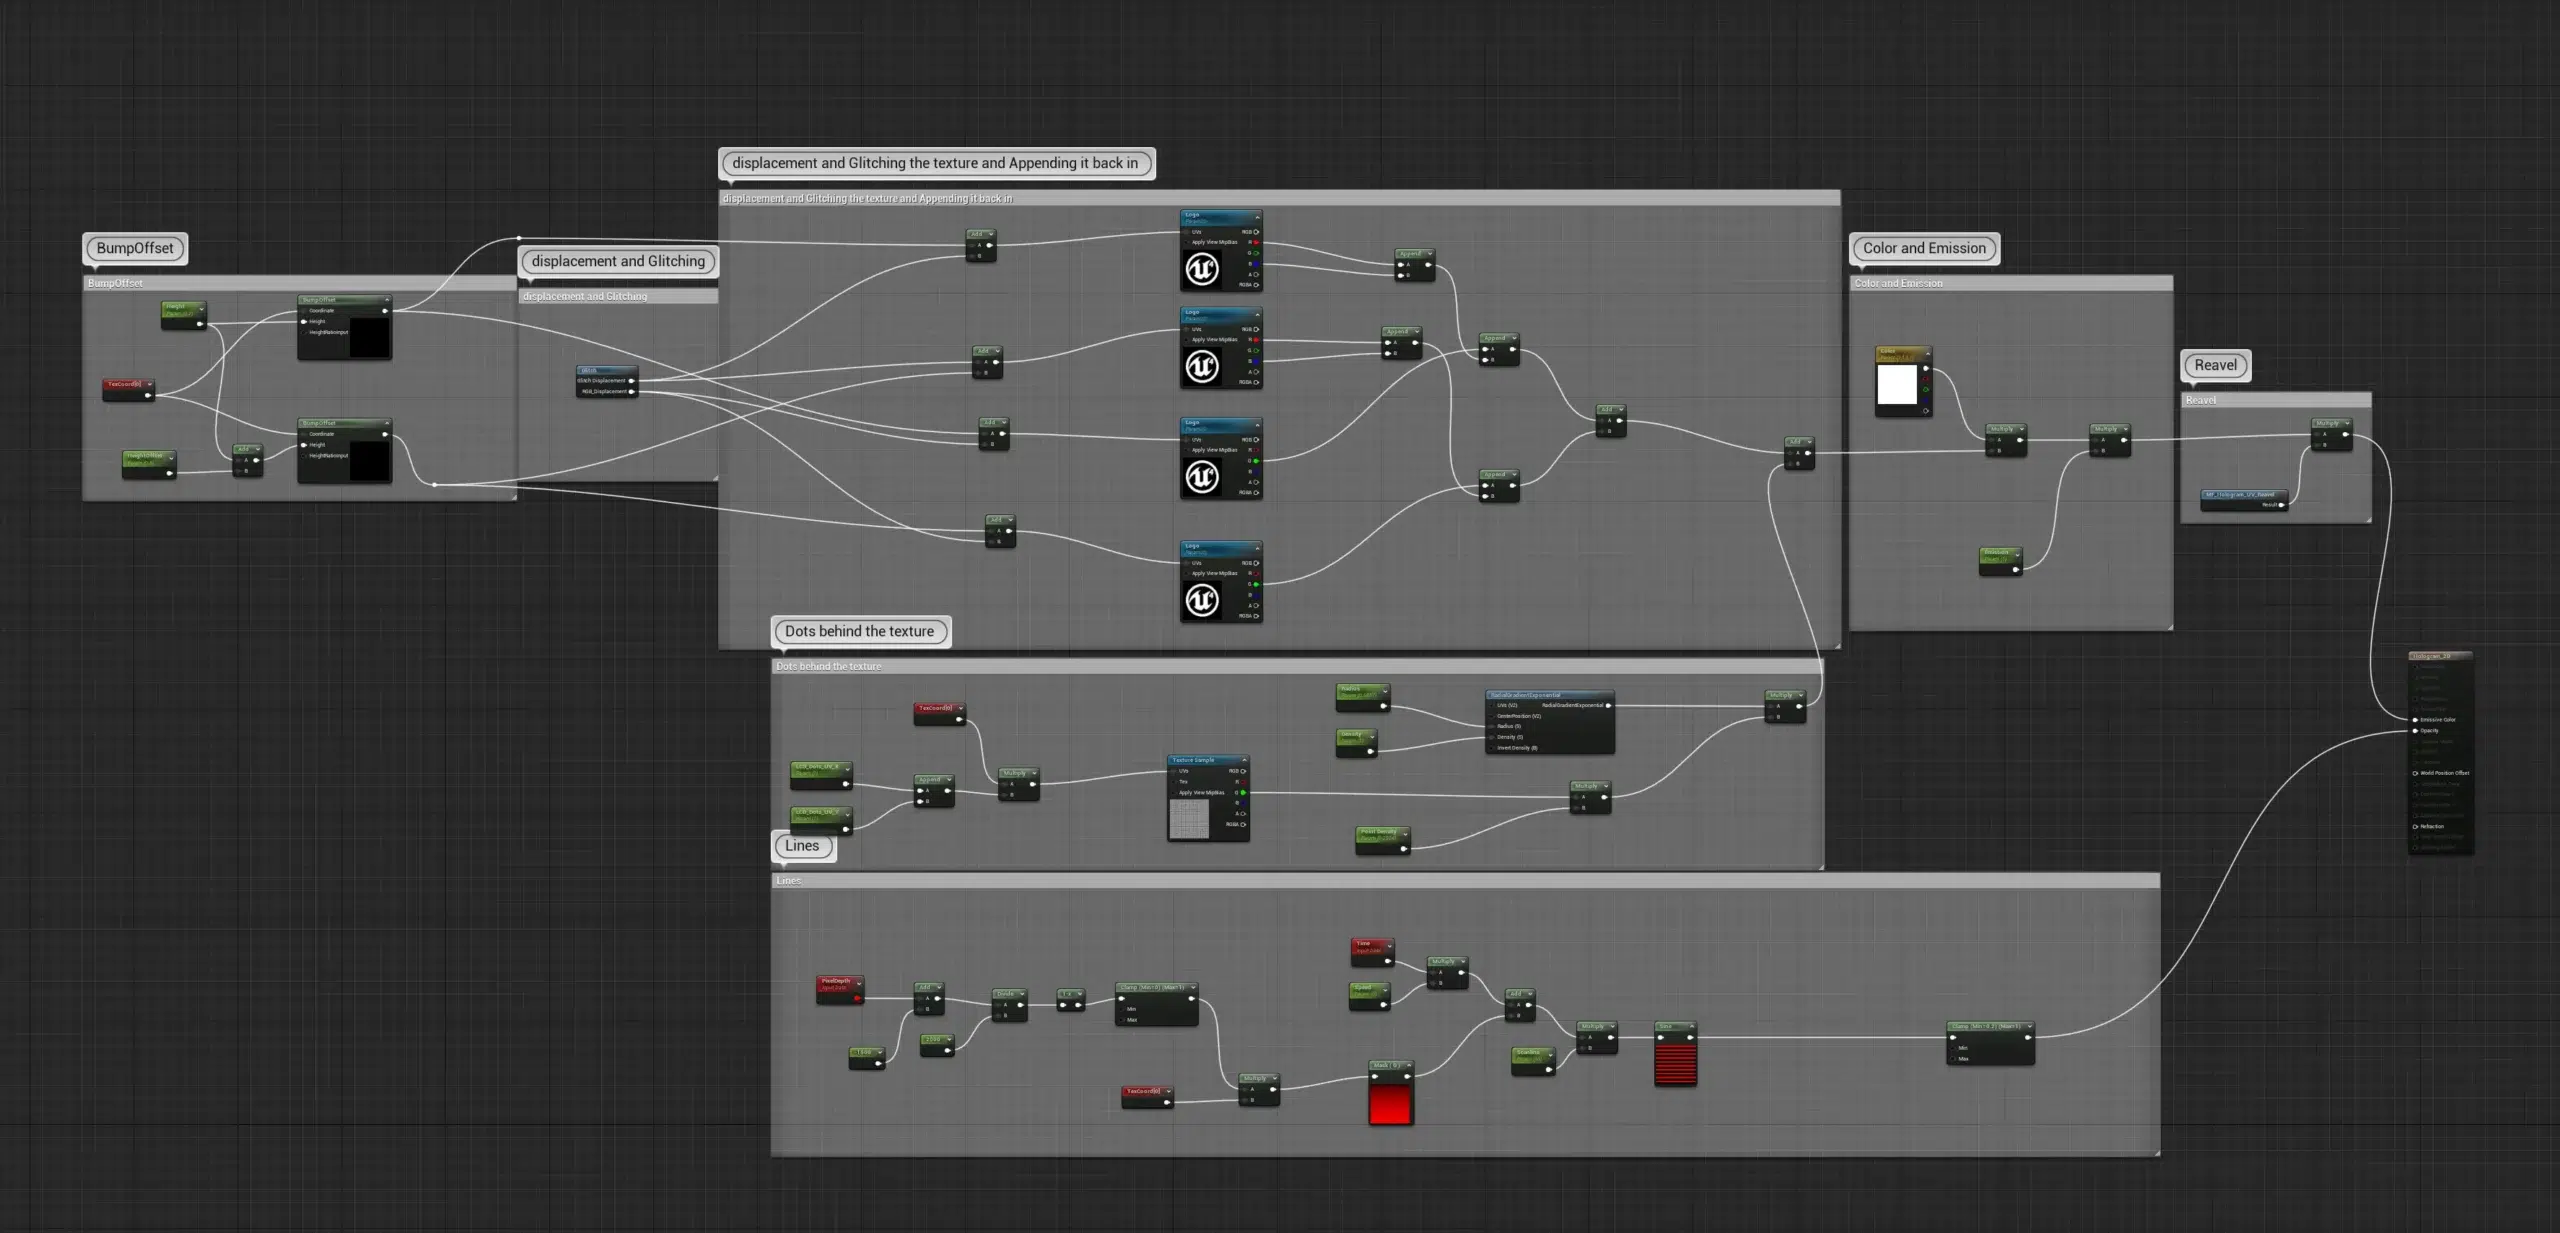
Full material function
Full material
Thank you for reading and I hope you found this hologram tutorial in Unreal Engine 5 helpful.